
Are you facing challenges building a Generic OAuth 2 Custom Connector in Power Automate? You’re not alone. With limited documentation and examples few and far between, securing power automate connectors with OAuth 2 can be daunting. In this guide, we’ll walk through creating a generic OAuth 2 Custom Connector in Power Automate. Although our implementation at Track uses the widely-adopted Auth0 for authentication, these principles are generally applicable to any OAuth 2 provider.
To help you follow along, ensure you have:
Firstly, navigate to Power Automate and initiate the process to create a new Custom Connector. You’ll need to enter two essential pieces of information:
api.track.com/v1.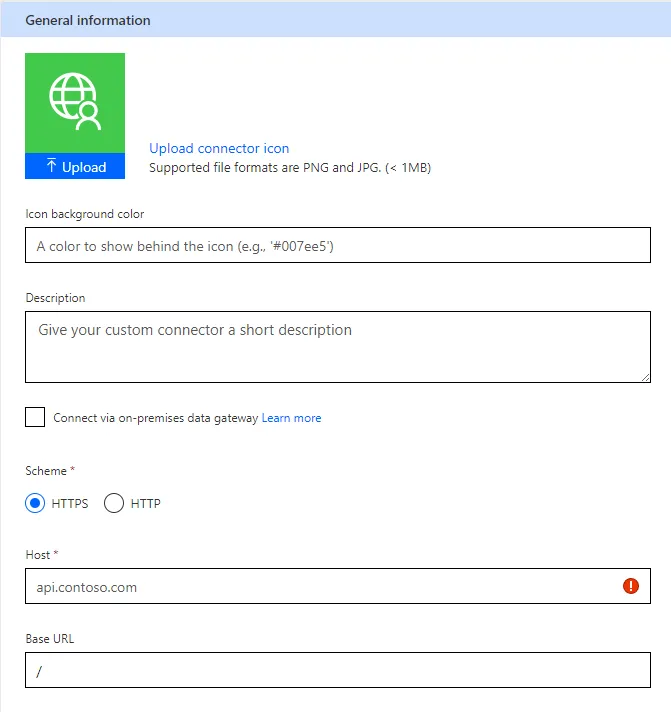
Proceed to set up the security parameters for your Custom Connector. Choose the Generic OAuth 2 option for Auth0 or any other provider that’s not readily available.
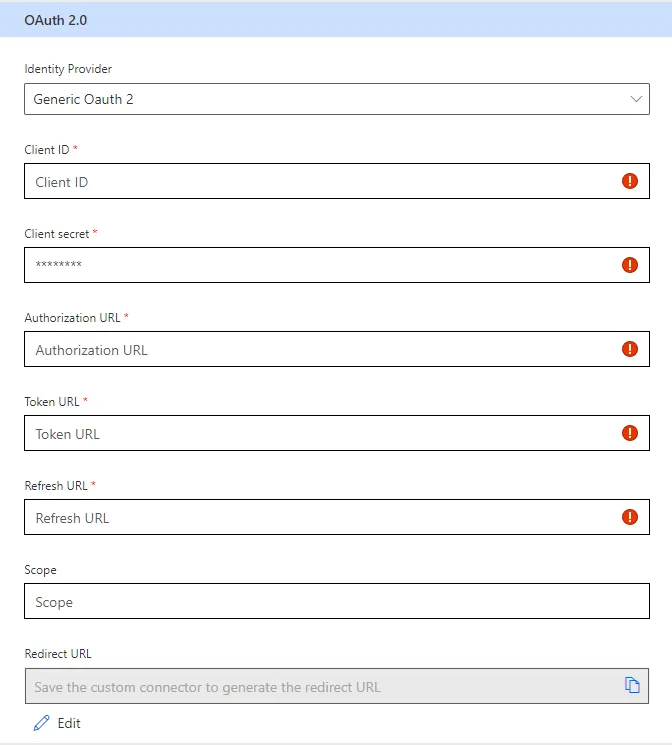
Your OAuth 2 provider will provide you with a Client ID and Client Secret. For Auth0, these can be found within your application’s settings. Additionally, you need to configure the authorization, token, and refresh URLs as specified by your OAuth 2 provider. In the case of Auth0, these would be:
https://<your-domain>.auth0.com/authorizehttps://<your-domain>.auth0.com/oauth/tokenhttps://<your-domain>.auth0.com/oauth/tokenTo enable automatic token refreshing, you should specify offline_access as a scope. For Auth0, make sure Allow Offline Access is enabled in your API settings.
If you want your connector to automatically refresh tokens, you will need to set offline_access in the scope field to ensure the authorization server returns a refresh token that your connector can use. Additionally, in the case of Auth0, you need to ensure that your API has the Allow Offline Access toggle enabled in the settings.
Generally, you may also want to pass custom parameters to the authorize endpoint, such as for configuring the audience claim for JWT validation. There are a number of ways to do this:
Track is designed as a multi-tenant solution that integrates with organisations through enterprise logins. To direct users to the correct Auth0 /authorize endpoint, we developed a Tenant-Aware Authorization Endpoint. This acts as a dynamic proxy, enriching the authorization process by identifying the user’s organisation. This allows us to provide additional parameters to the Auth0 /authorize endpoint which ultimately directs the user to the correct enterprise login screen.
Some common issues and resolutions you may encounter when testing your Custom Connector are:
Power Automate provides a state parameter to your authorization url, which is used to prevent CSRF attacks. If the same state value is not returned back to Power Automate in the redirect URL, you will receive a connection error. Some OAuth 2 providers, such as Auth0, will provide SDK libraries that attach additional values to the state parameter, or encode the state parameter in a specific way before it is sent to the /authorize endpoint. You will need to ensure that the state parameter is returned in the redirect URL in the same format as it was sent by Power Automate.
Power Automate provides a redirect_uri parameter to your authorization url, which typically must be configured with your auth provider as an allowed callback url in order to prevent Open Redirect Attacks. If the same redirect_uri value is not returned in the redirect URL to Power Automate, you will receive a connection error.
If you are performing tests on the Power Automate UI, you may notice a window like this:
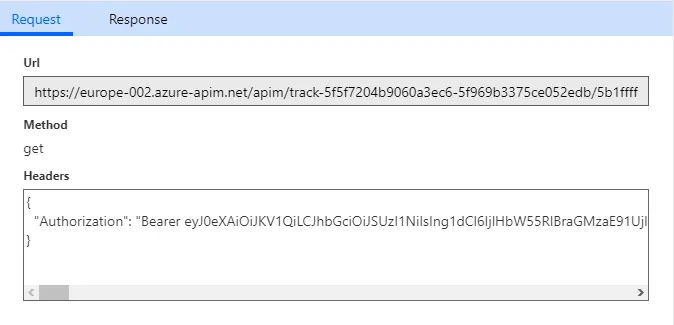
Note that if you were to decode this JWT on jwt.io, you would see that the aud claim is set to https://management.azure.com/ or similar. This is because Power Automate is using the Azure Management API to perform it’s request to your service. This JWT is not the token which your API will recieve, the tokens for your connection are stored under the hood and retrieved by Power Automate when it makes a request to your API. A small but important detail to be aware of.
Congratulations, you’ve successfully set up a secure OAuth 2.0 Custom Connector in Power Automate. Through this guide, we’ve covered the specifics of setting up a Custom Connector in Power Automate, and some advanced configurations like creating a Tenant-Aware Authorization Endpoint, particularly useful for multi-tenant applications like Track.
Implementing Generic OAuth 2.0 in Power Automate Custom Connectors can be challenging. However, with the correct approach and understanding, you can significantly improve the security and efficiency of your Power Automate workflows.
If you found this guide useful, consider sharing it with others who might benefit. Follow us on Twitter and LinkedIn for more.
Thank you for reading, and happy automating